
Appearance
Floor plans and rooms
A floor plan is a picture of the floor laid on the map under its rows: an architect's drawing, a CAD export, or the evacuation plan photographed on the wall by the lift. Floors keeps one plan per floor, lifts it to its floor's height and puts it where the floor stands. Over a plan, the rooms can be traced, by hand or by a vision model, and the rooms then draw, wall themselves, carry their names and take their data from a query, by name, with no geometry in your database.
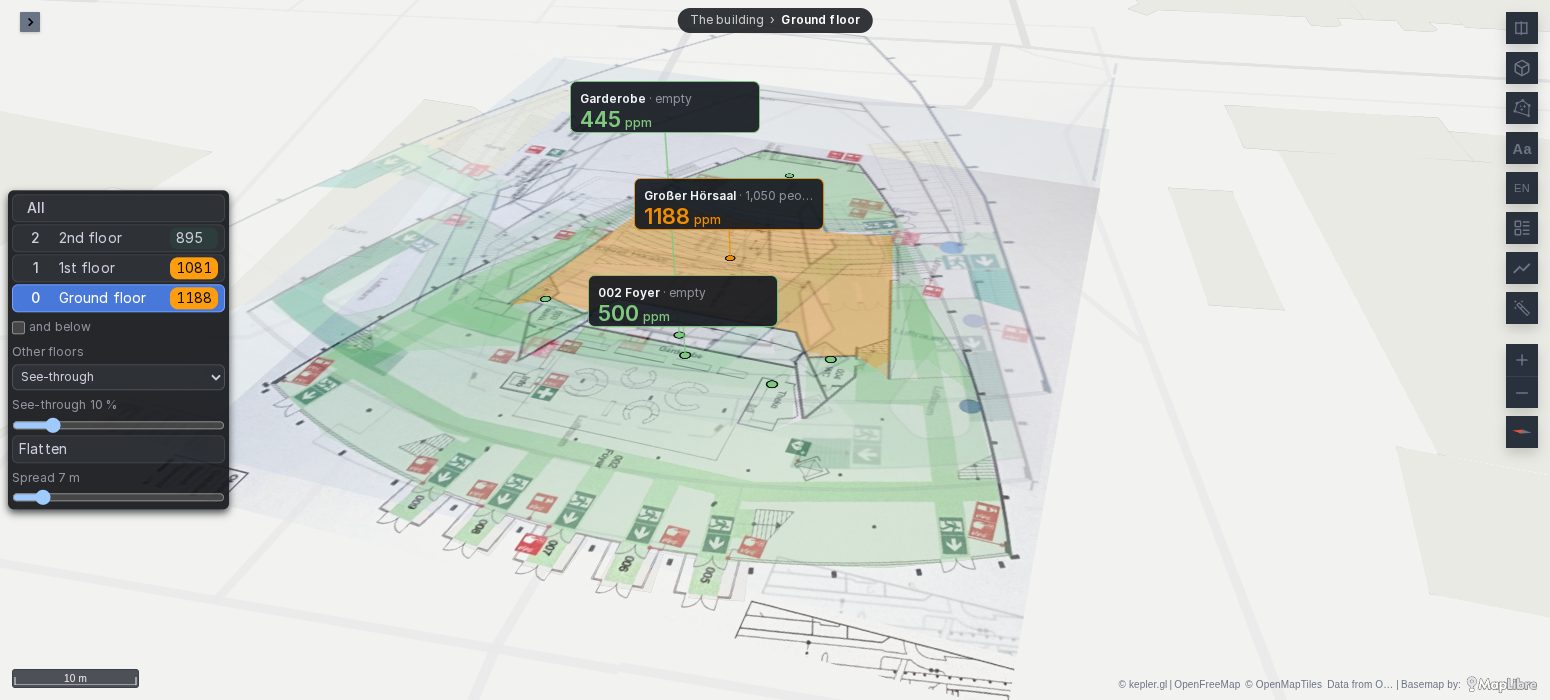
Since Plus 1.7.0
Floor plans and rooms are new in Plus 1.7.0, not released yet.
The map above is live: Audimax Hamburg from its evacuation plans, public and read-only. Its three plans are photographs from Wikimedia Commons (Minderbinder, CC BY-SA 4.0), carried in the dashboard; the people and the CO₂ in its rooms are simulated. Drag or play the Time Brush under it to go through the day.
Plans and rooms are set in the Indoor tab of kepler's side panel: a floor's name in the tab opens its window, whose Plan and Rooms tabs hold them. They are saved with the panel, so the dashboard carries them.
A plan per floor
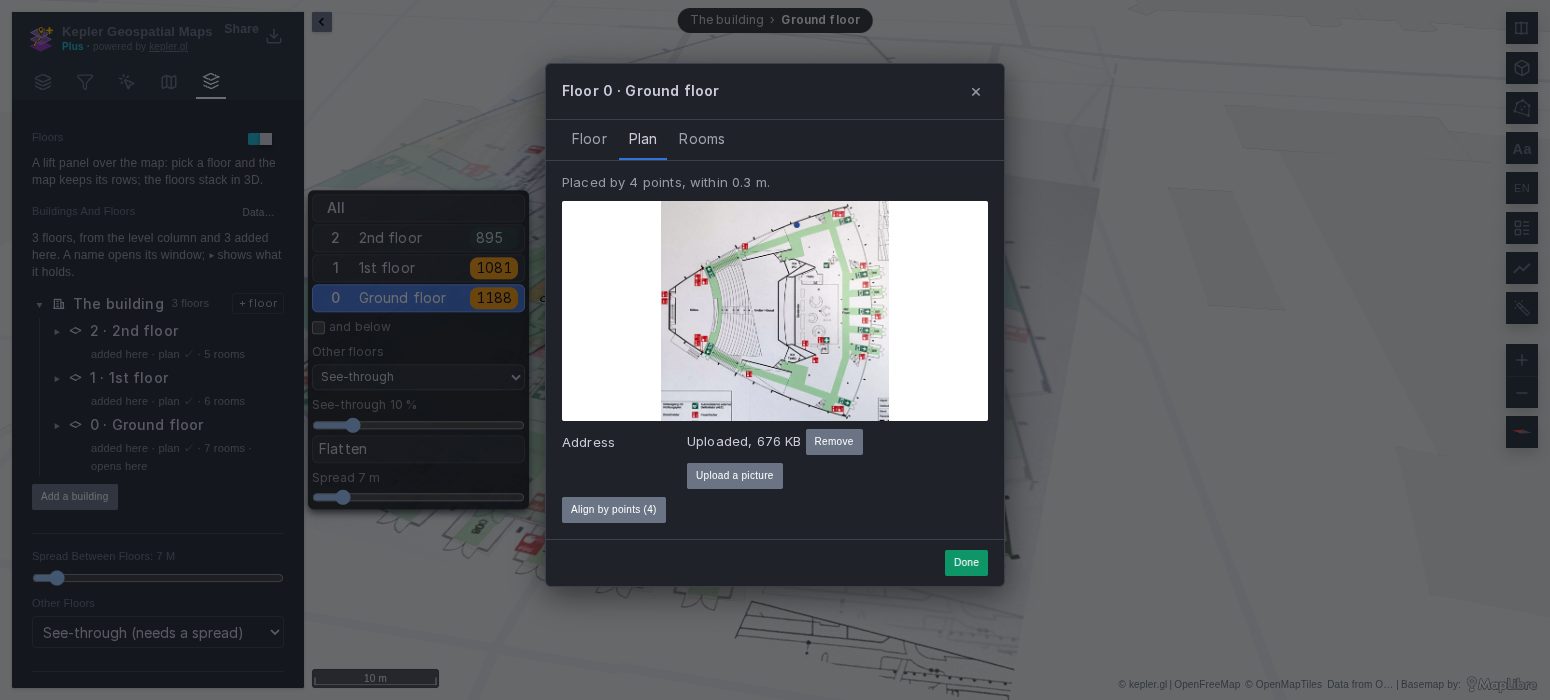
In the floor's window, on Plan, give the picture:
- Address: an
https://address, or a file of the plugin. Any other address is refused, as a 4D Model's is. The picture's server must let Grafana's page read it (CORS) for its rooms to be traced. - Upload a picture: a PNG, JPEG, WebP or SVG from your computer, kept in the dashboard. A large one is shrunk in the browser to 2,048 pixels a side and at most 1 MB; a bigger plan is better given by address.
Where the plan lies
A plan is placed in one of three ways, the first that applies:
- By points. Align by points asks for a spot on the plan you can find on the map (a corner, a column, a door), then the same spot on the map, three times or more. The plan is moved, turned and stretched to fit the points (exactly with three, as closely as it can with more), and the window says how close: Placed by 4 points, within 0.3 m. More points, spread over the plan, refine it. This is the way for a photographed plan, and for any plan of a real building.
- At an anchor. For a schematic or a building that is not on the map: Settings → Plans → Plans not on the map yet sets a centre (Latitude, Longitude), a Width in metres and how far it is Turned from north. Every plan without points lies there, its depth from the picture's shape.
- Over the floor's rows. Without points or an anchor, the plan is stretched over the extent of its floor's rows. It is a start, rarely exact.
A plan "hangs" as it was drawn: an evacuation plan by the lift is often drawn with the view from where it hangs, so south or east may be up. Points take care of that; an anchor needs it in Turned.
Drawing the plans
The plans are a query of the panel's own, floorplans, with a row per floor. In the Indoor tab, Layers lists it as Floor plans: its eye adds the layer if it is not on the map yet, and shows or hides it. The layer follows the floor picked like any other.
Plans are mostly white paper. The layer turns white to transparent, so the base map and the floor below show through the paper: Settings → Plans → White to transparent sets from which lightness, or off.
Rows placed on the plan
Rows with no coordinates but a place on the plan, such as sensors marked on the drawing, stand on their floor's plan by two columns:
| Column | What it is |
|---|---|
plan_x | Across the picture from its left edge. |
plan_y | Down the picture from its top edge. |
Settings → Data → plan_x, plan_y count says in what: Pixels of the picture (as Grafana's Canvas panel counts them), A share of the picture (0 to 1), or Metres from its top left. The rows gain latitude and longitude wherever the plan lies, and move with it when it is aligned again. They need the floor column too.
Rooms
Rooms are the plan made into shapes: each traced once, then drawn, walled, named and coloured by its data on every view. Under a floor, the Indoor tab's ▸ lists its rooms.
Traced on the plan
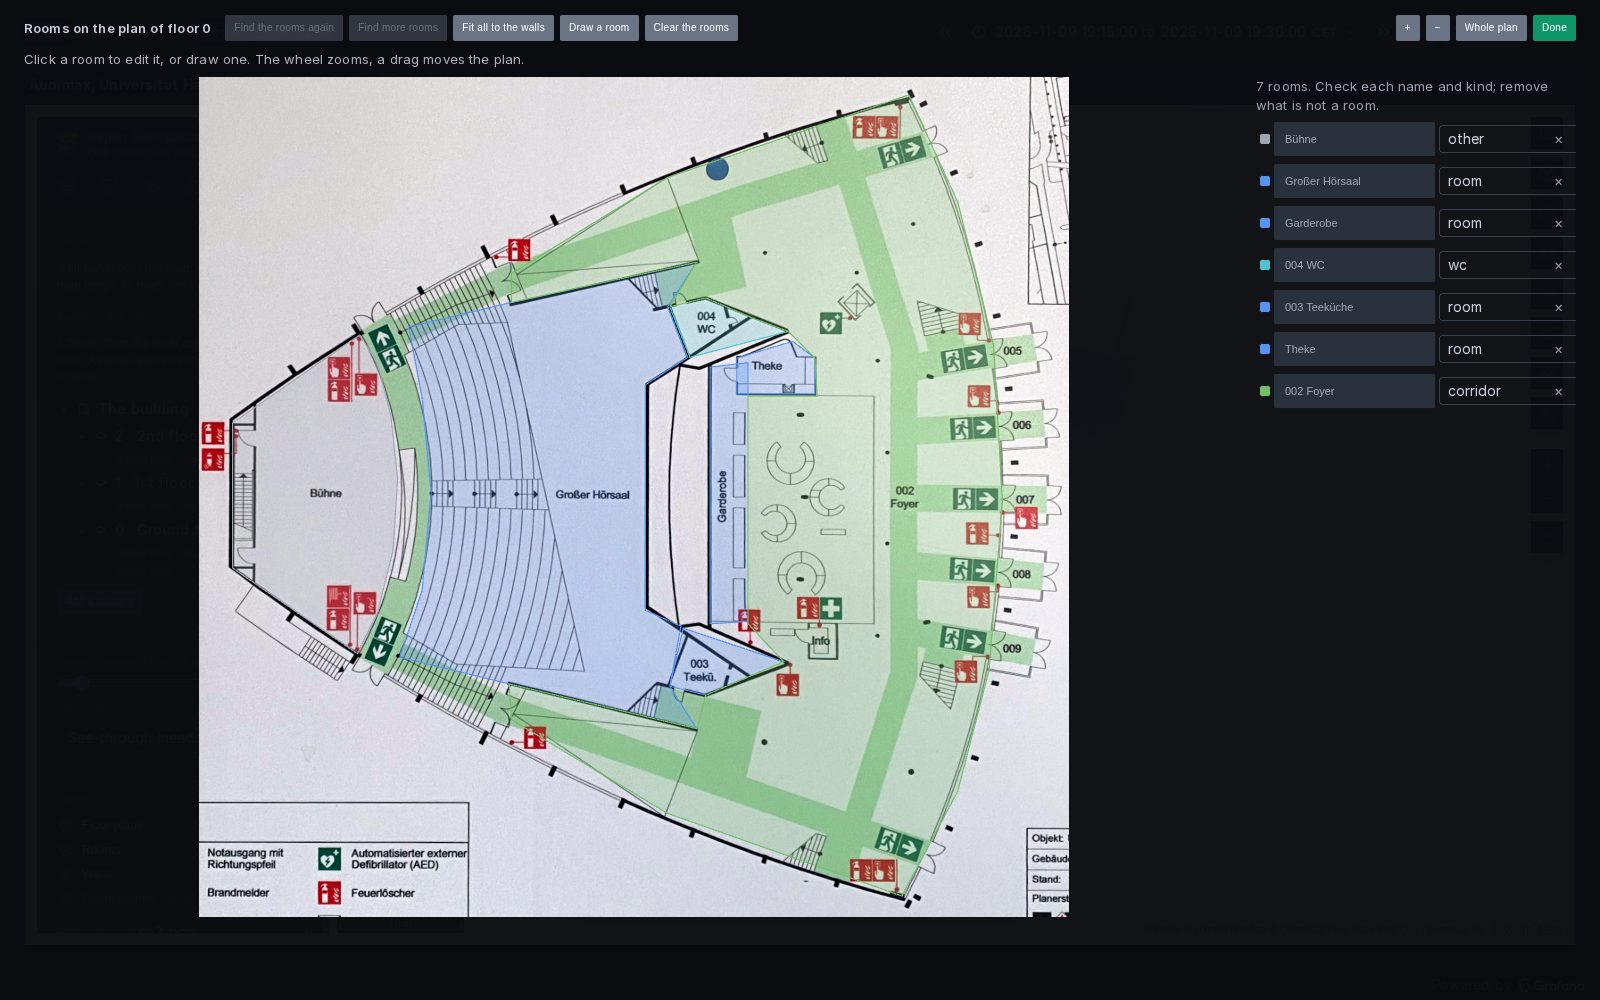
In the floor's window, on Rooms → On the plan, open the rooms editor, a full-screen view of the plan:
- Find the rooms sends the plan to a vision model, which returns each room's outline, name and kind. It needs Grafana's LLM app installed, with the provider and key its admin chose: the plan goes to that provider, and only when someone presses the button. Without the LLM app, the rooms are drawn by hand. Find more rooms looks again, part by part, for the rooms it missed. Fit all to the walls moves each outline onto the plan's dark lines.
- Draw a room: click each corner; a double-click, Enter or the first corner closes it, Esc stops.
- Click a room to edit it: drag a corner, double-click to add one, Alt-click to remove one, Delete removes the room.
- In the list, check each room's name and kind: room, corridor, stairs, elevator, wc, exit or other. The name is what a query's rows are matched by.
The model reads what is written on the plan; check its rooms before you keep them, as you would a colleague's tracing.
Drawn on the map
For a floor with no plan, or rooms the plan does not show, Rooms → On the map → Draw rooms on the map opens a map of its own, with the streets or satellite imagery, the floor's plan and its rows underneath, to draw the rooms on. They draw and carry data as the traced ones do.
What the rooms draw
The Indoor tab's Layers lists them, each with its eye:
| Layer | Draws |
|---|---|
| Floors drawn | The outlines of the floors drawn by hand. |
| Rooms | Each room's shape on its floor, coloured by its kind; pick a reading as its colour in kepler's Layers tab. |
| Walls | Walls along the rooms, 1.2 m high (Settings → Rooms → Walls), open where a fitted room meets a door gap. |
| Room names | Each room's name over it. |
| Dials | A Gauge dial per room on a reading: Dials of picks the reading, Add the dials the layer. |
The rooms, their walls and the floors drawn are queries of the panel's own (planrooms, planwalls and flooroutlines), so each layer is styled in kepler's Layers tab like any other.
Data for the rooms
Settings → Rooms → Data for the rooms picks a query whose rows are the rooms' readings, and Matched by its column the column naming the room (by default room, room_name, space, space_name, unit, name, raum or sala). Each room takes the values of the row with its name, so a query of readings by room name colours the rooms, fills the dials and the rooms' tooltips:
sql
SELECT room, co2_ppm, people, temperature FROM readings_now;Start from nothing
A building with no indoor data yet can be drawn in the Indoor tab, then fed by name:
- Turn Floors on and press Add a floor: its level (a number) and its name. Add the others the same way, and Add a building for a second one.
- In a floor's window, on Floor, Draw it on the map: its outline, so the map has something to fly to.
- On Plan, give it its plan and Align by points.
- On Rooms, trace its rooms on the plan, or draw them on the map.
- Add a query of readings by room name, and pick it in Data for the rooms.
A query whose rows name the same level (and building) later lands on the floor added by hand.
The Floor plan layer
Floor plan is also a layer of its own in kepler's layer list, for a picture laid flat on the map without Floors: a site plan, a scanned map, one plan per row of a query. Each row gives:
| Column | What it is |
|---|---|
image_url (or plan_url, floor_plan, image) | The picture: an https:// address, or a file of the plugin. |
latitude, longitude | Its centre. |
width_m, depth_m | Its size in metres. |
rotation | Degrees clockwise from north. |
corners | Instead of the centre and size: its four corners, [[lng, lat], …], bottom left, top left, top right, bottom right. |
Its altitude column lifts it, to floor_z on an indoor map. With Floors on, the Indoor tab makes this layer for you on the floorplans query; write one by hand only for pictures Floors does not place.
When it does not draw
- The plan does not show. Its layer is not on the map: in the Indoor tab, Layers → Floor plans, press its eye. Or its address is not
https://or a file of the plugin. - The plan is in the wrong place, turned or mirrored. It has no points and was stretched over the floor's rows: Align by points.
- Find the rooms is not offered. Grafana's LLM app is not installed or not set up; draw the rooms by hand.
- The picture could not be read. Its server does not allow it to be read from Grafana's page (CORS): upload it instead.
- The rooms have no colour from the data. Data for the rooms is not set, or the names do not match: the room's name in the editor must equal the query's room column, letter for letter, case aside.