
Appearance
4D Model
A 3D model whose rows name its parts. In Schedule mode each row gives a part's start and finish, and at the map's instant a part is still to build (a faint outline), under construction (one colour) or built (the model's own colours, or a colour from a column): construction schedules (BIM 4D) and phased works. In State mode each row is a reading of a part, and each part takes the colour of its latest reading at the map's instant: digital twins of a plant, a building or a machine, live or replayed.
Since Plus 1.6.0
The 4D Model layer is new in Plus 1.6.0. State mode, the parts' cards, the see-through model and data in the model's frame are new in Plus 1.7.0, not released yet.
See it at work
Two dashboards on the live demos use it, one for each way of reading the model:
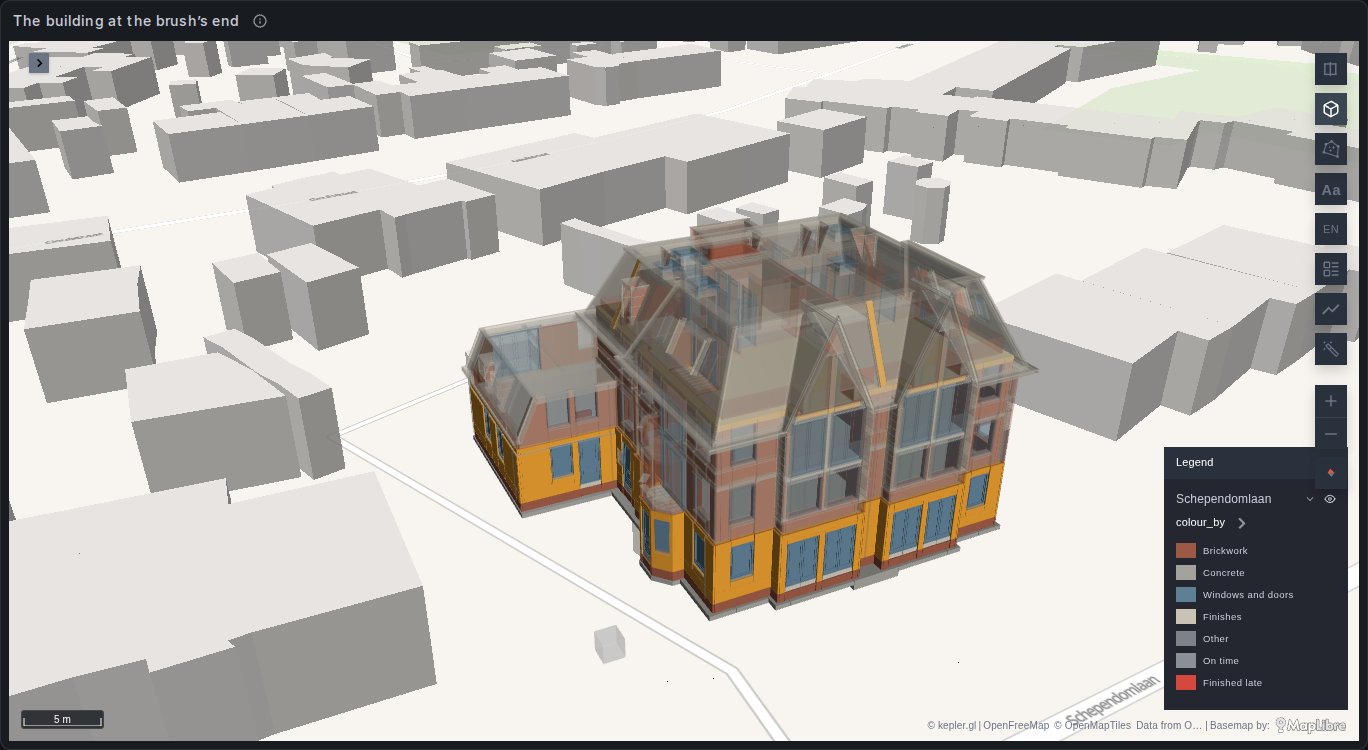
- Schependomlaan, built day by day: an apartment block built in Nijmegen in 2015, from the public Dataset Schependomlaan (TU Eindhoven and partners, CC BY 4.0). A Time Brush walks the build: the model shows every element as it stood at the brush's end, and the schedule, the S-curve and the cards follow the same window.
- Eraring, live: a power station in New South Wales with its four units coloured by what each one is doing, from the market operator's five-minute readings, in State mode. A Time Brush replays the week; left alone, it follows the newest reading.
What the model needs
A glTF model, .glb or .gltf, whose nodes are named by the parts' ids. Every mesh under a node of that name is the part, a nameless node taking its parent's name, so a model exported with one node per element gives one part per element, whatever the exporter put under it.
From IFC, the BIM exchange format, each element has a GlobalId that the schedule refers to. IfcOpenShell's IfcConvert writes a glTF with each element's node named by its GlobalId:
sh
IfcConvert --use-element-guids model.ifc model.glbThe model's origin is its (0, 0, 0): glTF's Y axis is up and -Z is north, so a model exported in a site's local coordinates stands as it was drawn once its origin is placed and turned (see Placing the model).
The browser fetches the model itself, so its address must be one the viewer's browser can reach: served by Grafana's own host, or by another that allows it with CORS. A Content Security Policy that lists the hosts the browser may connect to must list that one. Each model is loaded once per page, whatever the number of maps and refreshes.
What the query needs
In Schedule mode, one row per part (for State mode, see Parts in the colour of their readings):
| Column | What it is for |
|---|---|
| an id (text) | The part's node name in the model, such as an IFC GlobalId. |
| a start (time) | When the part's work starts. |
| a finish (time) | When it ends. Optional: without one, a part is built the instant it starts. |
| latitude, longitude | The model's origin, the same on every row. The first row shown places the model. |
| anything else | Shown in kepler's tooltip on hover, and usable as the layer's colour: a trade, a contractor, a status. |
A construction schedule usually gives a task per row and the elements each task builds. Join them so each element has its own row:
sql
SELECT e.guid,
       t.name        AS task,
       t.start_date  AS start,
       t.finish_date AS finish,
       e.kind,
       site.latitude,
       site.longitude
FROM elements e
JOIN tasks t ON t.id = e.task_id
CROSS JOIN site;          -- one row: the model's origin
Several rows for one part (one per task, say) make one: it starts with the earliest and finishes with the latest, and keeps the first row's colour and tooltip. Rows naming a part the model does not have are left out.
On Auto, the layer finds its columns by name, without regard to case:
| Setting | Columns found on Auto, in order |
|---|---|
| Part ID | guid, globalid, global_id, ifc_guid, ifcguid, element_id, element, part_id, part, node, id |
| Start | start, start_date, start_time, planned_start, task_start, begin, begins, from, time |
| Finish | finish, finish_date, finish_time, end, end_date, end_time, planned_finish, task_finish, until, to |
The panel renames the time column it detects to time, which Start finds on Auto.
Adding the layer
The panel never creates a 4D Model layer by itself. In kepler's layer panel, add a layer, pick 4D Model as its type, set its latitude and longitude columns, and paste the model's address in Model URL. Then tilt the map with the 3D control to see the model standing.
The instant
Every part is drawn as it stands at one instant:
- A time filter on the Start column: the end of its window. This is the filter kepler's time playback moves, and the one a Time Brush moves through the map's time sync. The filter sets the instant only: it hides no part, since a part built long before the window is still standing.
- Otherwise: the end of the dashboard's time range. The time picker then walks the build.
At that instant, each part is in one of three states:
| State | When | Drawn |
|---|---|---|
| Still to build | Before its start | A faint outline of what is coming, or nothing (Still to build) |
| Under construction | From its start through its finish | The Under construction colour, amber by default |
| Built | After its finish | The model's own colours, or the layer's colour (Built parts) |
A row without a start is always built. A part no row names (the site, the surroundings, anything the schedule leaves out) is drawn as built, or left out with Parts with no row off.
Built parts in a colour
With Built parts at Layer colour, built parts take the layer's colour instead of the model's. Colour the layer by a column, and the model shows that column: the trade of each element, the contractor, whether it was finished on time. A text column takes a custom ordinal range, each value with its own colour (see Colour palettes and scales).
The Schependomlaan dashboard colours by trade or, with its Colour variable, by whether the as-built record has the element late. The query picks the column the layer colours by:
sql
SELECT guid, task, time, finish_date, latitude, longitude,
       CASE WHEN '${colour:raw}' = 'as_built' THEN as_built ELSE kind END AS colour_by
FROM parts;
Parts in the colour of their readings
Set Mode to State, and each row is a reading of the part it names: a unit's output, a pump's pressure, a room's temperature, as a SCADA or IoT table gives them, any number of rows per part. At the map's instant each part takes the layer's colour of its latest reading at or before that instant. Colour the layer by the reading, with a custom threshold range, or by a state column with a custom ordinal range (see Colour palettes and scales).
| Column | What it is for |
|---|---|
| an id (text) | The part's node name in the model. |
| a time | When the reading was taken (Reading time). Optional: without one, every row is current. |
| the values | What the layer's colour and the tooltip read: the reading, a state, the time as text. |
| latitude, longitude | The model's origin, the same on every row. |
The instant is the same as in Schedule mode, with the reading time in place of the start: the end of a time filter on it (a Time Brush through the map's time sync, or kepler's own playback), else the end of the dashboard's time range. So the map shows the asset now, and the same query replays it: drag the brush back and every part shows what it read then.
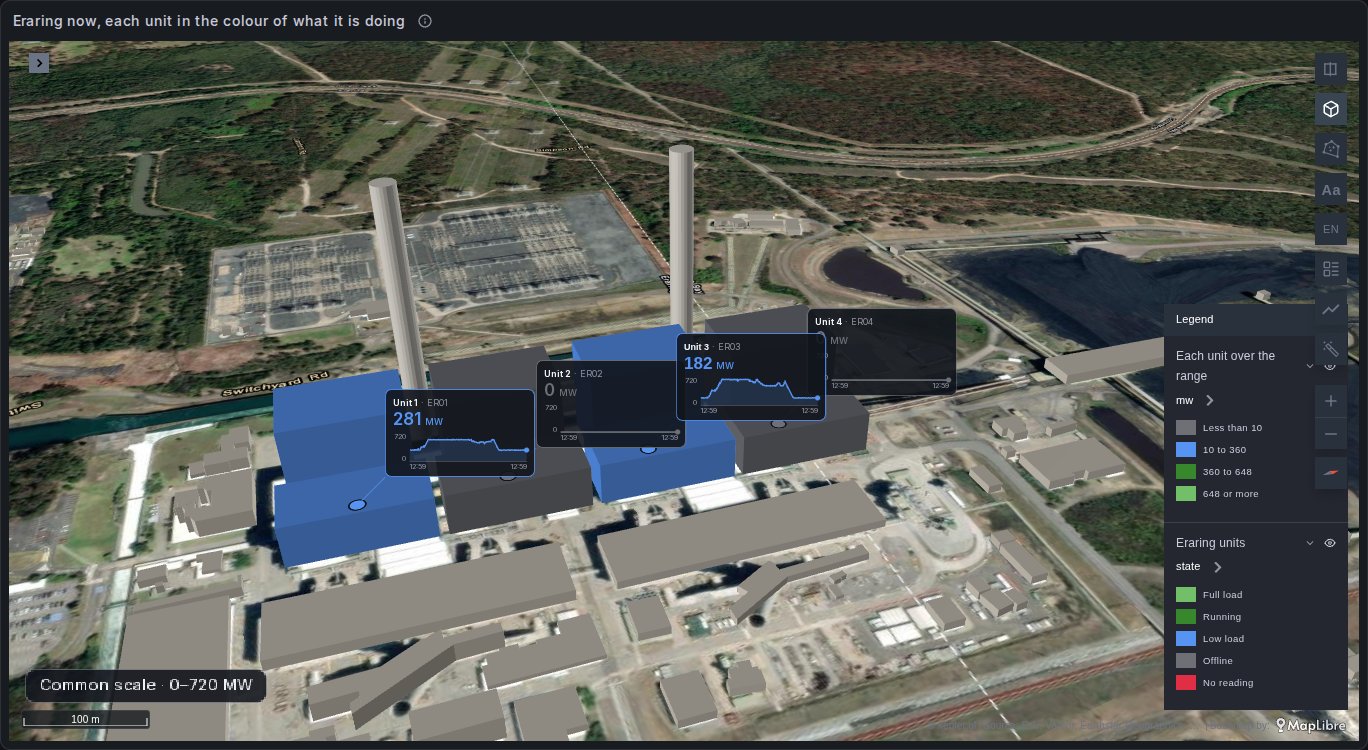
The Eraring dashboard returns every five-minute reading of its four units over the range, and a Time Brush above the map sets the instant:
sql
SELECT r.ts AS time,                            -- Reading time
       u.duid,                                  -- the unit's node in model.glb
       round(r.mw, 1) AS mw,
       CASE WHEN r.mw < 10  THEN 'Offline'
            WHEN r.mw < 360 THEN 'Low load'
            WHEN r.mw < 648 THEN 'Running'
            ELSE 'Full load' END AS state,      -- the layer's colour
       u.origin_latitude AS latitude, u.origin_longitude AS longitude
FROM readings r JOIN units u USING (duid)
WHERE r.ts BETWEEN $__timeFrom() AND $__timeTo();
In State mode:
- Reading time is found on Auto among
time,ts,timestamp,_time,datetime,observed_at,reading_time. None reads every row as current: a part's last row wins, so a query ordered by time ends with the newest. - Parts with no reading yet, whose first reading comes after the instant: a faint Outline, or Hidden.
- Reading stale after (min): a latest reading older than this at the instant counts as none, so a sensor that has gone quiet shows as an outline. 0, the default, never.
- Parts no row names (the hall, the chimneys, the ground) keep the model's colours, or are left out with Parts with no row off.
- Start, Finish, Built parts and Under construction do not apply.
Up to 256 parts named by the rows, each part is drawn on its own and its hover shows its own reading. Above that, the parts of one colour are drawn together, which keeps a model of thousands of parts as fast as a few, and are not picked on hover.
A card on each part
The same query gives each part a card with its reading at the instant and its series: set the layer's Cards to Card on hover or Cards always. Each card stands on a stem above the top of its part, and shows the layer's colour field when it holds numbers, or the column you pick under Value. A Grafana alert on a part can mark its card. See Cards on any layer.
Placing the model
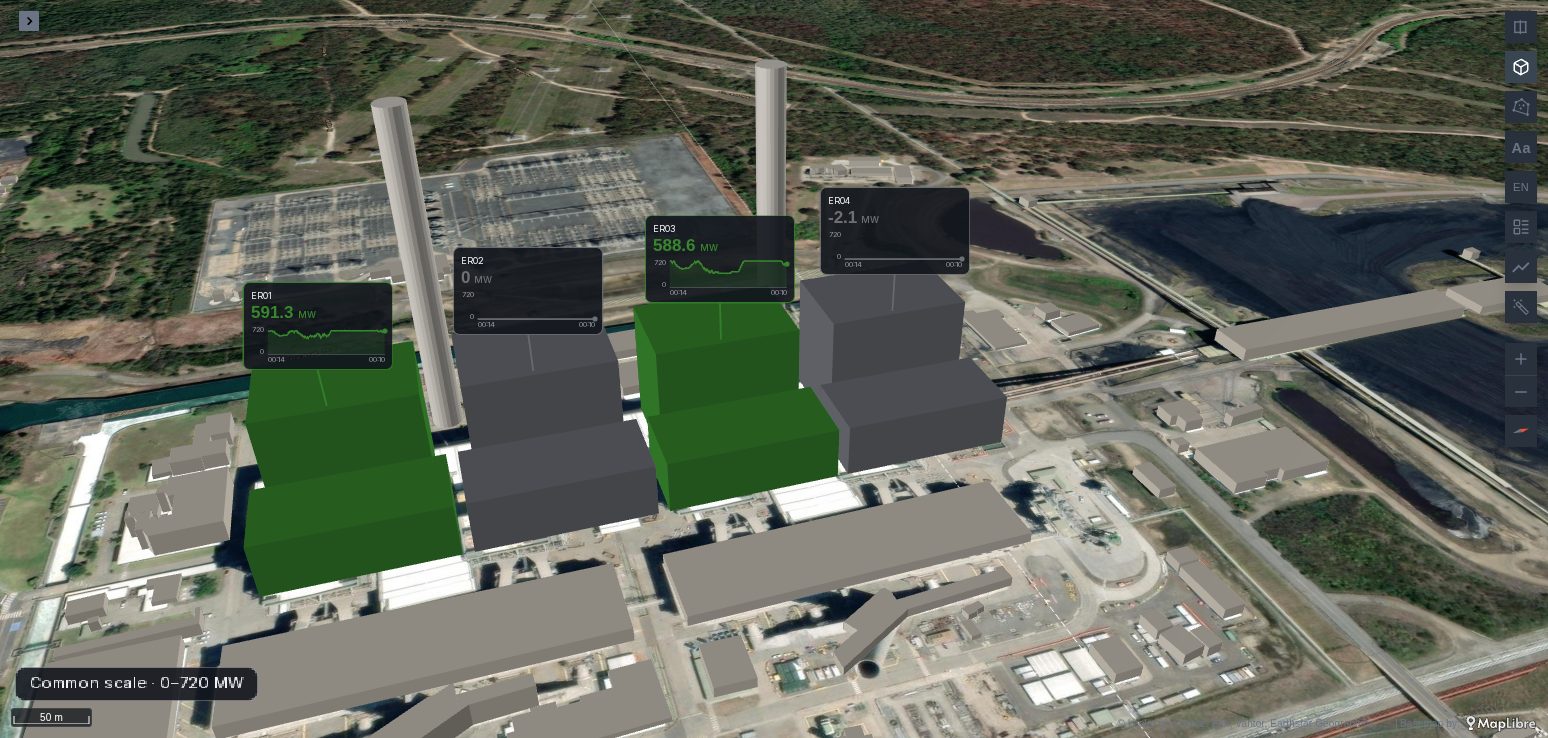
The model's origin stands at the rows' latitude and longitude. Heading turns it clockwise from north about that origin, and Altitude lifts it, in metres. Turn the heading until the model sits on the base map's footprint.
Other queries on the same map can be written in the model's own coordinates, by part or in metres from its origin: sensors, people and forklifts indoors, pipes and rooms. They are placed where the model stands and follow it when it is turned. See Data in a model's frame.
Seeing inside the model
With its Opacity under 1, in kepler's Color group, the model is drawn see-through, and what stands inside it shows: a Fleet's people and forklifts on a floor, a callout's anchor, a room. At full opacity it hides what is behind its walls, as a building does.
Options
In the layer's settings, under 4D Model, Placement and Schedule (Readings in State mode), and in kepler's Color group.
| Option | What it does | Default |
|---|---|---|
| Mode | Schedule: rows give when each part is built. State: rows are readings. | Schedule |
| Model URL (.glb) | The model's address. Its nodes are named by the Part ID column. | empty |
| Part ID | The column naming each row's part. | Auto |
| Start | When each part's work starts. A time filter on it sets the instant. | Auto |
| Finish | When its work ends. Without one, a part is built the instant it starts. | Auto |
| Heading (°) | Degrees clockwise from north the model is turned by, about its origin. | 0 |
| Altitude (m) | Metres the model's origin stands above the ground. | 0 |
| Still to build | Parts not started yet: Outline, faint and see-through, or Hidden until they start. | Outline |
| Parts with no row | On, parts no row names are always drawn as built; off, they are left out. | on |
| Built parts | Model's colours, or Layer colour: one colour, or by a column such as a status. | Model's colours |
| Under construction | The colour every part takes while it is under construction. | amber |
| Reading time | State mode: when each reading was taken; None, every row is current. | Auto |
| Parts with no reading yet | State mode: Outline or Hidden. | Outline |
| Reading stale after (min) | State mode: a reading older than this at the instant counts as none; 0, never. | 0 |
Opacity, in the Color group, applies to the whole model; under 1, the model is see-through (see Seeing inside the model). The Cards group is described in Cards on any layer.
Hover and tooltip
Hovering a part shows its row in kepler's tooltip: the task, the dates, the trade, any column the query returns. Pick the fields under Tooltip in kepler's interactions panel; the layer's Interaction group turns hovering off. With Cards at Card on hover, the part's card shows in place of the tooltip. Parts still to build are not picked, so the pointer reaches the built ones behind their outline.
When it does not draw
- No layer at all. The panel does not create a 4D Model layer from the data; add one.
- Nothing on the map. Model URL is empty, the browser cannot fetch the model (look for a CORS or Content Security Policy error in the browser's console), or no row has latitude and longitude.
- The whole model in its own colours, nothing in time. No column was found for Part ID, or its values are not the model's node names. Check the ids against the node names in a glTF viewer.
- Everything built. No Start column was found, or the instant is past the last finish: look at the dashboard's time range.
- Everything still to build. The instant is before the first start: the dashboard's range ends before the schedule begins.
- Parts under construction that should be built. A time column was taken as Start on Auto. Set Start to the right column, or, for readings rather than a schedule, set Mode to State.
- State mode: every part an outline. No reading at or before the instant (the dashboard's range or the brush ends before the first), or Reading stale after is shorter than the readings' interval.
- The model is off its footprint. Set Heading and check that the rows' coordinates are the model's origin, not the building's centre.
Plus layers share more behaviour, such as clicks and drawn polygons: see Plus layers.
Use it for
- Construction schedules: what should stand on a given day, what is late, which trade is on site.
- Phased works: a road, a rail line or a pipeline built section by section.
- Digital twins: the units of a plant, the floors of a building or the bays of a substation coloured by their live readings (State mode), each with its card, and replayed with a Time Brush.
- Indoor maps: a see-through building with its people, robots and sensors placed in its own coordinates.
- Maintenance campaigns: the parts of an asset coloured by their last inspection.